2023年度地学教育学会発表 「スケルトン地震計」製作レシピ. 2023-08-01-10-26 to 2024-02-06, 2024-06-05 Yoshio Okamoto
Recipe for making a skeleton seismograph with English Version.
Publiaction:
岡本義雄・根本泰雄:教室で用いるスケルトン地震計 −アクリル樹脂,ネオジム磁石,およびESP32基板−,日本地学教育学会第77回全国大会滋賀大会Poster,English_Version,2023
0.観測風景と2014年能登半島地震記録.Observation sites and 2014 Noto Peninsula earthquake.
大阪教育大学附属天王寺中学校(大阪市天王寺区)物理研究室
Osaka Kyoiku University Attached Tennoji Junior High School (Tennoji-ku, Osaka) Physics Labo.
堺市立新檜尾台小学校 理科室
Sakai City Shin-Hinokiodai Primary School Science Room
以下のページへ,Go to the following page
http://seagull.stars.ne.jp/2024_Noto_Eq/seis_index.html
1.振り子部 pendulum part
アクリル板材の端材(https://www.acry-ya.com/products/detail/120/?size=38で入手).切断は専用アクリルカッター.切断の概要は下記を参照.
Acrylic sheet end material
(https://www.acry-ya.com/products/detail/120/?size=38). Cutting is done
by a special acrylic cutter. See below for an outline of the cutting
process.
※Super Analog technique library
http://www.yossi-okamoto.net/Fault_exp/Fault_exp_Part1.html
2.組み立て.
Assembly.

振り子と筐体の台 Pendulum and housing base

支柱部の組み立て.接着剤と4mmビス Assembling the support pillar section. Adhesive and 4mm screws

水平動振り子組み立ての様子.未装着のダンパーは次の写真 Assembling the horizontal pendulum. The uninstalled damper is shown in the next photo.

最初に試作したアルミパイプによるダンパー.やや制動不足で次の銅板に変更.The first prototype was made with aluminum pipe, but it lacked damping power, so the next copper plate was used.
次に試作した銅板(0.5mm)を丸めたダンパー.制動力が強くこれで決定.コイルと磁石の向きに注意(互いの出力が2倍に増す方向)
The next prototype is a rounded copper plate (0.5 mm). This damper is effective.Note the orientation of the coil and magnet (the output signals increase double each other).


上下動振り子の製作.構造はやや複雑になる.
上下動では主スプリングの特性と吊り方が固有周期を決定する.ここではKirnos型の吊り方と初期値が短い特注のバネを使用.真鍮の錘は振り子バランス調整用.
The vertical pendulum plates. The structure is a little complicated. In the vertical motion, the characteristics of the main spring and the suspension type determine the natural period. Here, Kirnos-type suspension and a custom-made spring with a short initial value are used. The Brass weights are used to adjust the balance of the pendulum.
上下方向に置かれた磁気回路とコイル.ダンパーは水平動と同じく0.3mm厚銅板.
Magnetic circuits and coils placed vertically. The specisfication is the same as horizontal one. The damper is a 0.3 mm thick copper plate as in the horizontal motion.
5V単電源(USB供給も可)で動く1chAmpとArduinoUno.デモ用の機材として使用.1chAmp and ArduinoUno, powered by a single 5V power supply (or USB), used for seismograph demonstration.
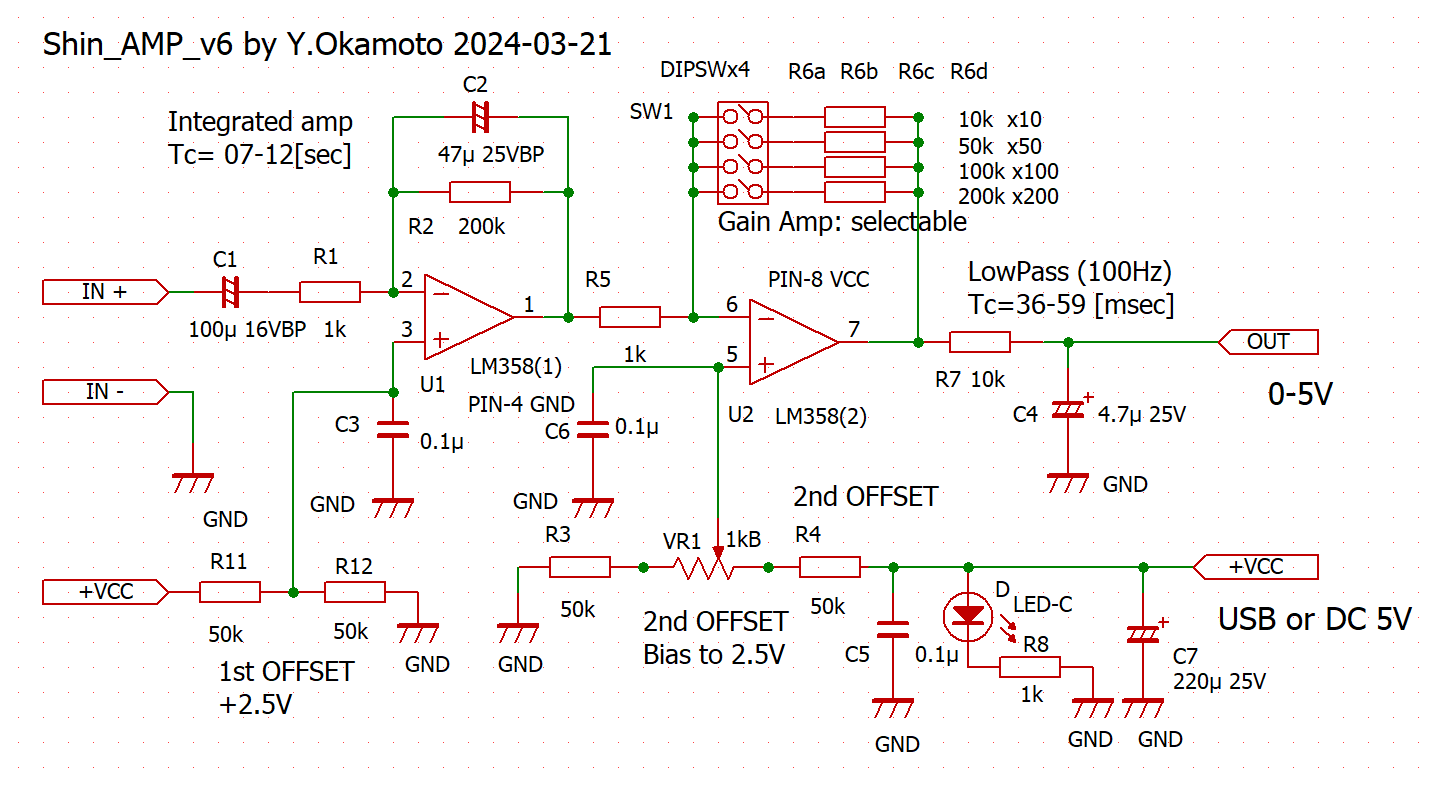
Amp回路図.積分回路の定数はまだ試行中.200kΩは100kでも可.
Amp circuit schematics. The constant of the integrated amp. is still under trial. 200kΩ could be 100k.

PC波形表示.従来の地震計ソフトを転用.ArduinoIDEとProcessingを使用.Windows,Linuxで使用可能.スケッチコードは近日公開.
PC waveform display. ArduinoIDE and Processing are used. Both on Windows and Linux. the sotware can run. The sketch code will be coming soon.
<材料の入手>
1.コイルの巻き方 How to wind up the coil.
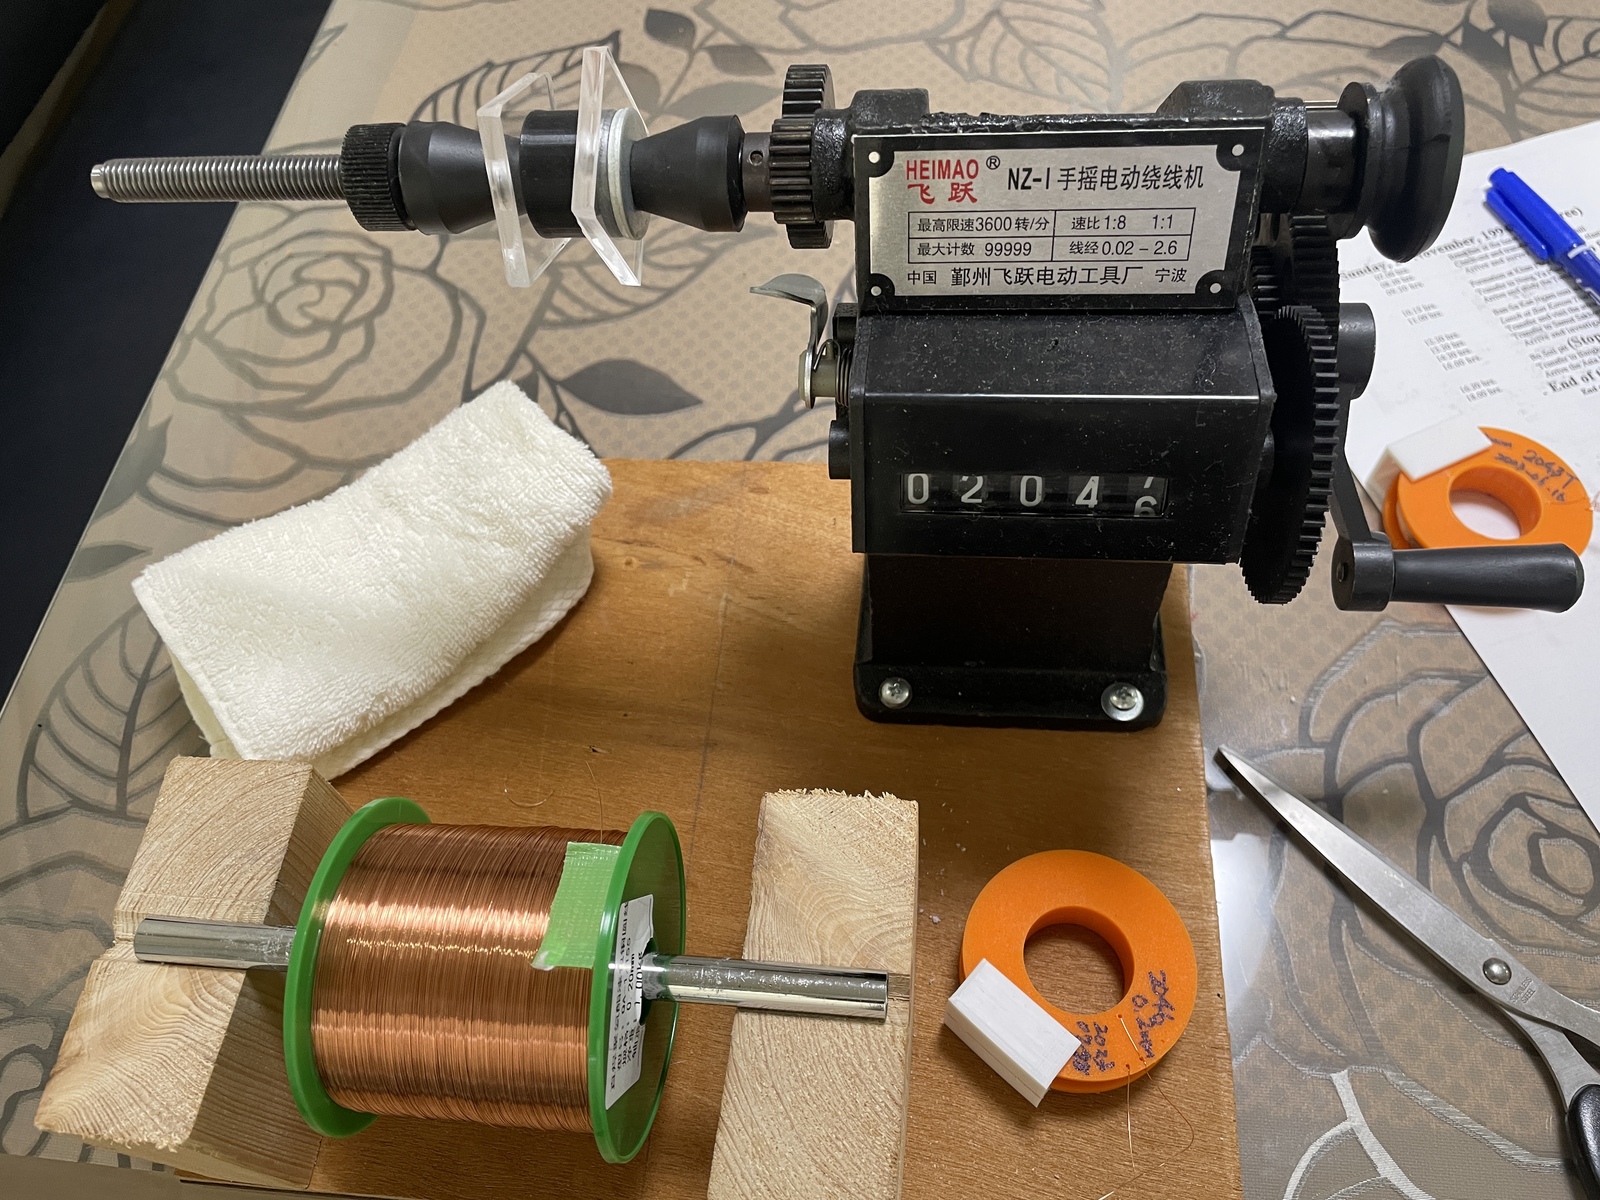
コイル巻は手巻きでもよいですが,上記の安価な手動の巻取り機を使うのがおすすめです.Amazonで買えます.
Coil
winding can be done by hand, but we recommend using the inexpensive
manual winder mentioned above, which can be purchased on Amazon.
※当然ですが,2個あるコイルの出力は信号が倍化する方に接続します.反対に接続すると双方の出力がキャンセルしあって信号がほぼゼロになります.
Naturally, the output of the two coils should be connected to the one whose signal is doubled. If they are connected in opposite directions, the outputs of both coils cancel each other and the signal becomes almost zero.
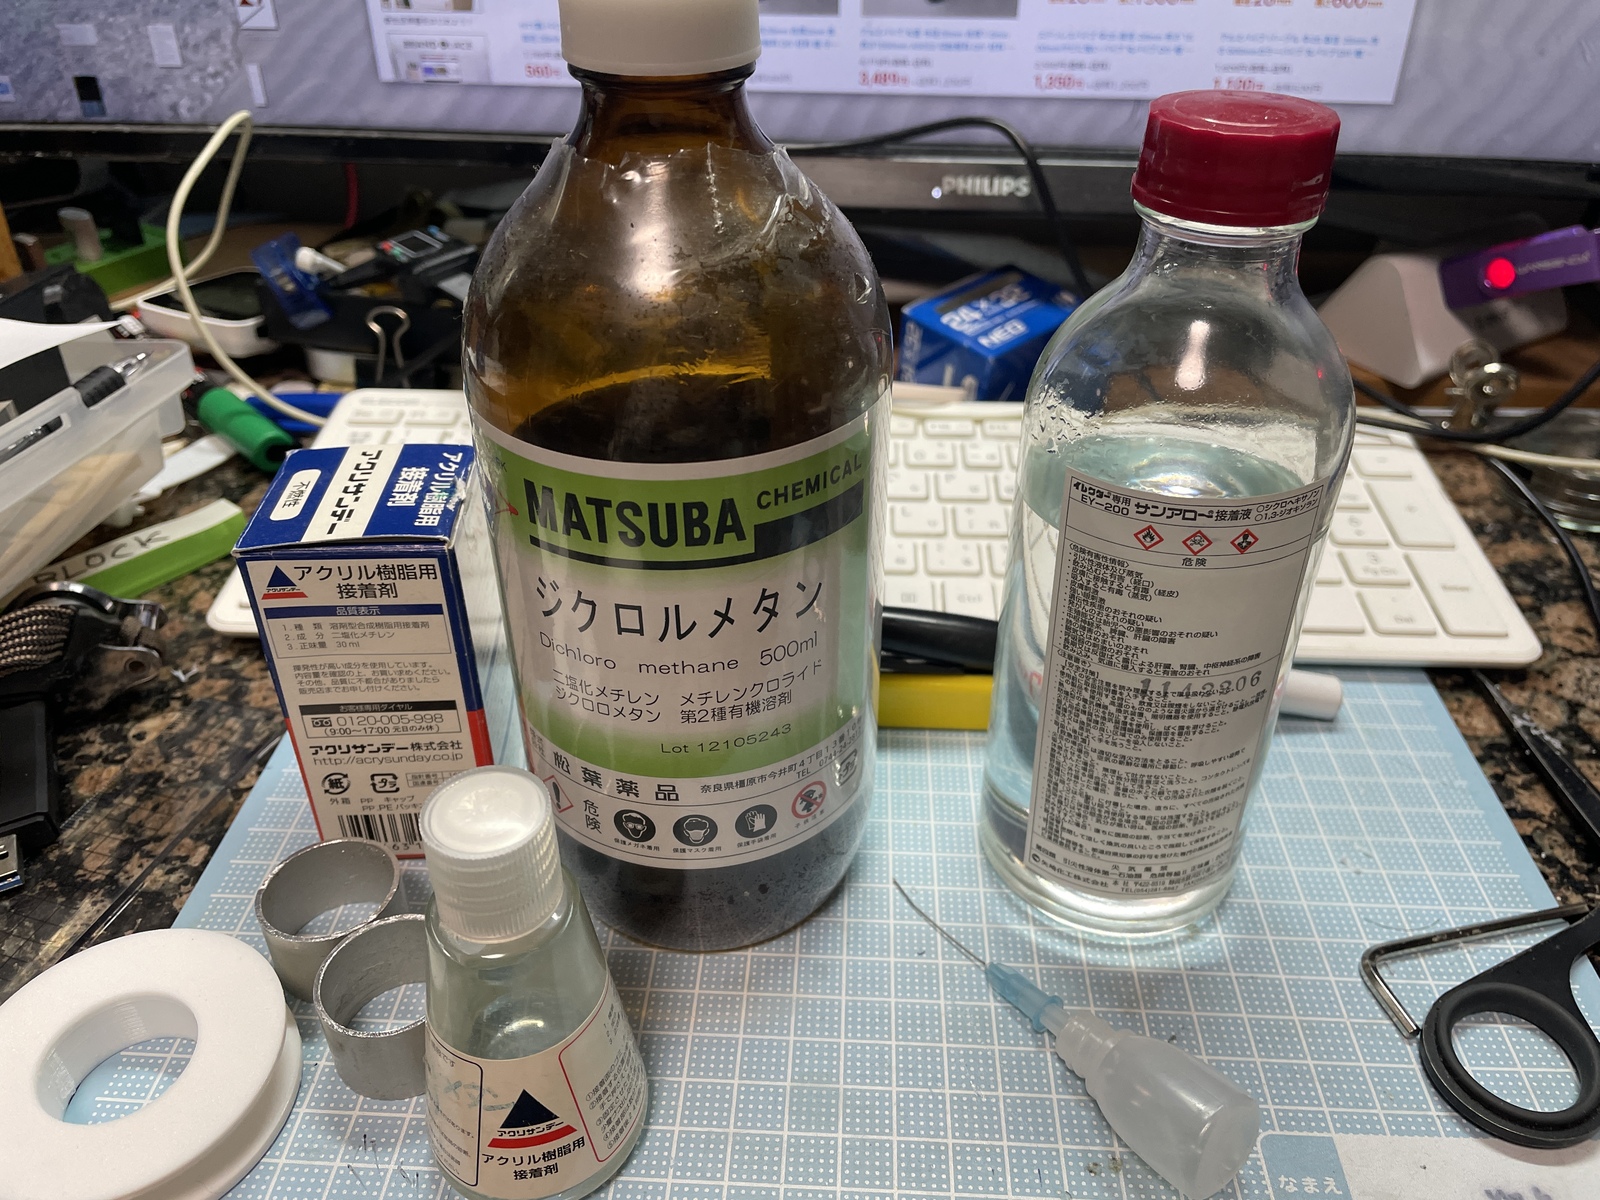
2.接着剤(Adhesive)
接着剤はアクリルサンデーを用いますが,高いので同成分のジクロロメタンをAmazonで買って小瓶に入れ替えて使っています.
Acrylic
sundae is used as the adhesive, but it is expensive, so I bought a
small bottle of dichloromethane with the same ingredients from Amazon
and used it instead.
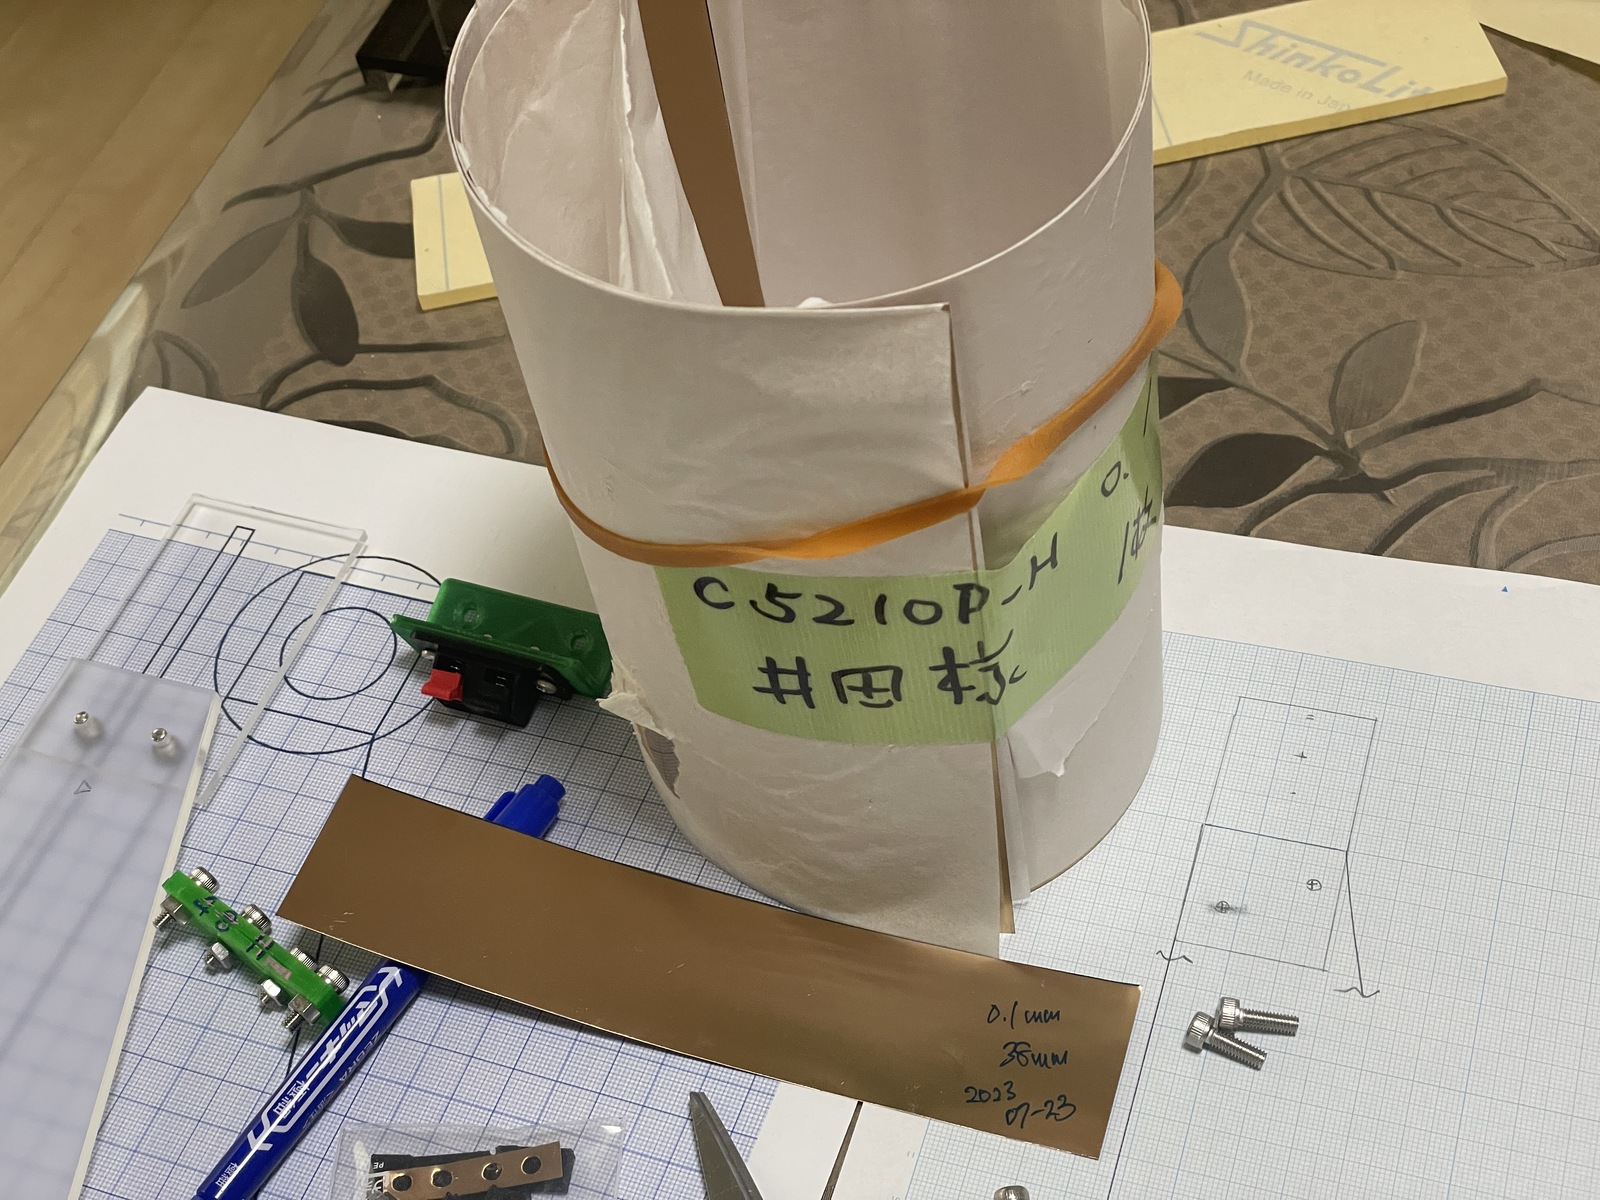
3.支点用のリン青銅板(phosphor bronze plate for fulcrum leaf spring)
冨士シャーシ りん青銅板0.1mm厚がAmazonで入手できます.これをハサミで切って使用します.詳細はまたアップします.ほかに金属材料店でバネ用と書かれたリン青銅板を入手されてもよいです.
Fuji chassis made Phosphor bronze sheet 0.1mm thick is available from Amazon Net shop. Cut it with scissors and use it. Details will be uploaded later. You can also get a phosphor bronze sheet labeled “for springs” at a metal material store.
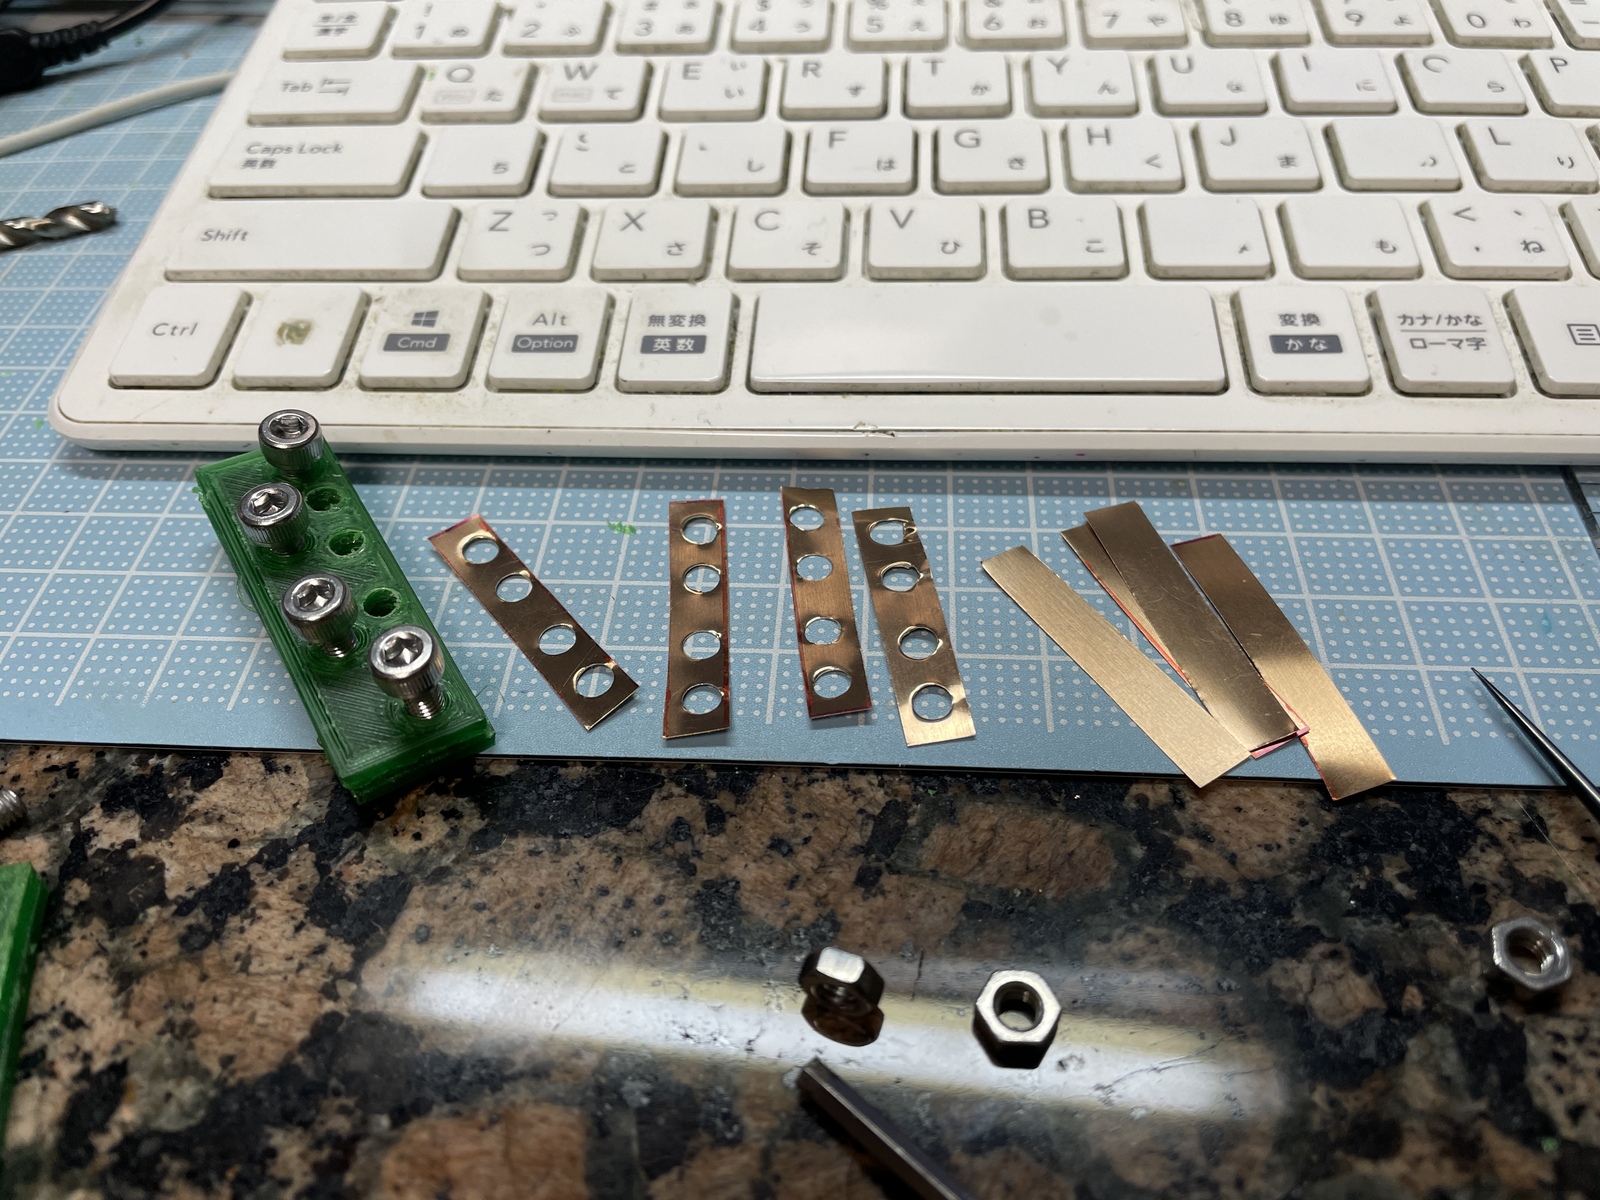
支点用バネの製作.小さく切ったリン青銅板を治具(3Dプリンタで製作)で挟んで,4mmドリルで孔を開ける.
Making a spring for a fulcrum. A
phosphor bronze plate cut into small pieces is placed between two jigs
(made using a 3D printer), and holes are drilled using a 4mm drill.
Copyright © 2024 Yoshio Okamoto All
Rights Reserved
